

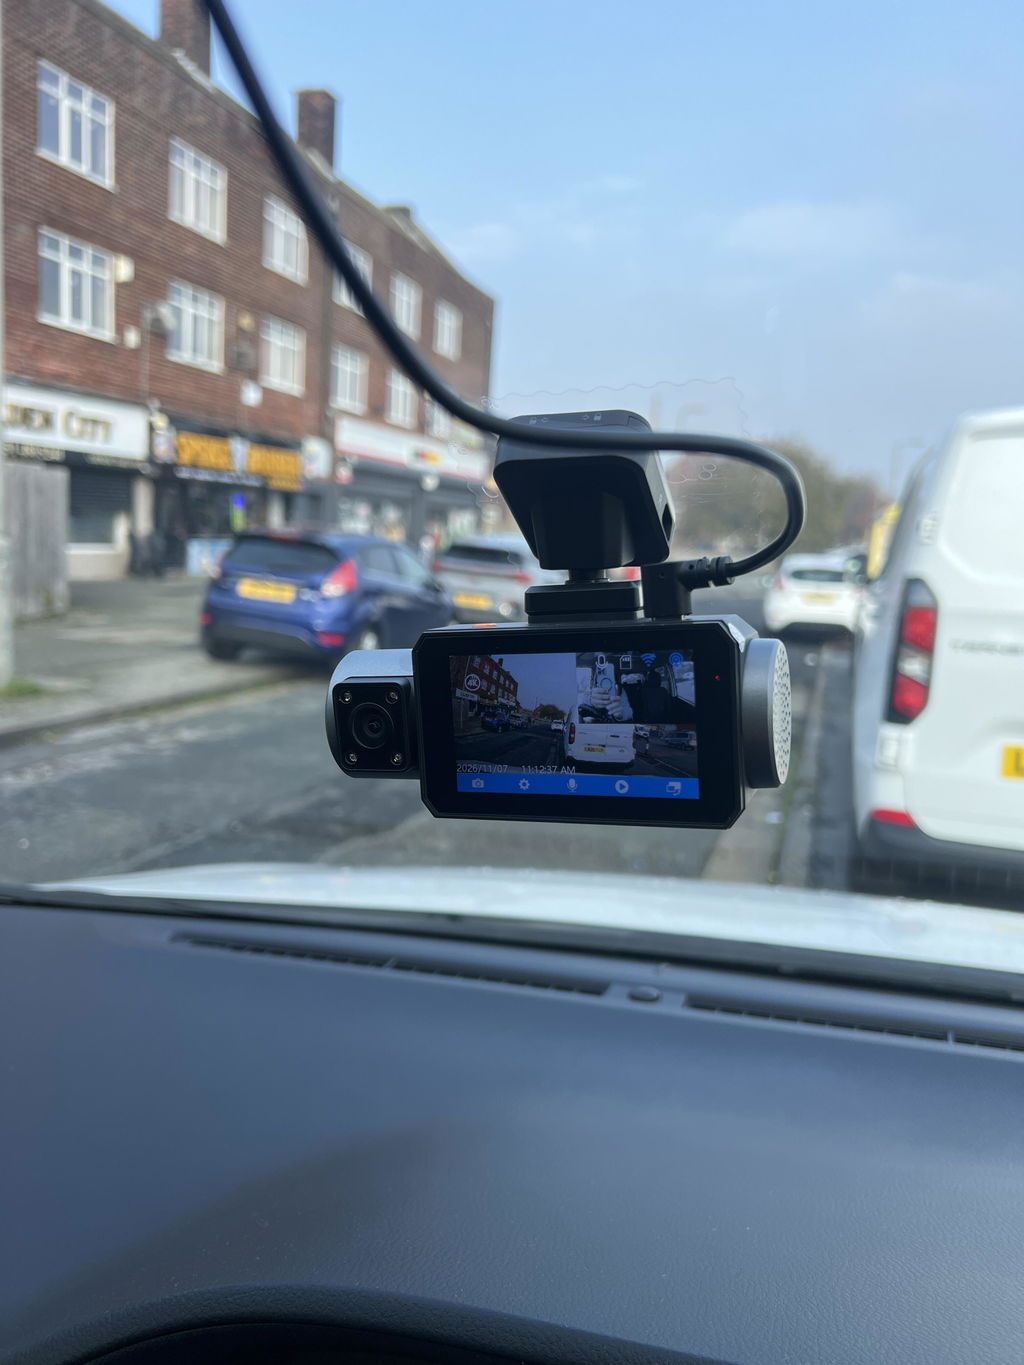
A dash cam front and rear setup can document the traffic ahead and the events developing behind your vehicle, but two cameras do not automatically remove every blind spot. Useful coverage depends on lens position, vehicle shape, glass angle, field of view, lighting, and a careful test before the adhesive mount becomes permanent.
This guide explains what each camera can prove, where rear placement changes by body style, and how to test a front and rear dash camera in realistic conditions. The goal is not to promise complete coverage. It is to help you build a two-camera record with fewer gaps and footage that is easier to interpret after an incident.
What Front Footage Proves and What It Leaves Unseen
Front footage is strongest at establishing the forward sequence of events. A centered front-facing dash cam can show traffic-signal phases, lane position, following distance, sudden braking, a vehicle entering your lane, and the timing between driver actions and impact. Audio and GPS data may add context when the selected camera records them, but their usefulness depends on recording quality and the applicable laws where the footage is captured or used.
The front lens cannot reliably show what happens behind the rear bumper, beside the rear quarter panels, or outside the windows. Roof pillars, mirror housings, passengers, cargo, and the vehicle body can block parts of the scene. Even a wide lens does not see through solid structure. For that reason, a front-and-rear dash cam installation should be treated as two overlapping views, not a substitute for mirrors, shoulder checks, or driver-assistance systems.
A quick framing check should show enough hood or dashboard edge to orient the viewer without letting the vehicle fill the frame. Keep the horizon close to the middle, confirm that the windshield wipers clear the lens area, and make sure the mount does not obstruct the driver's required view or interfere with factory sensors.
How Rear Footage Can Clarify an Insurance Dispute
Rear footage can add facts that a front-only recording misses. It may show how long another vehicle followed, whether it changed lanes before contact, whether brake lights or turn signals were visible, the moment of a rear impact, and whether a vehicle left the scene. In a chain collision, synchronized front and rear clips can help establish the order of impacts rather than leaving that sequence to memory alone.
Video does not decide fault by itself. An insurer, police agency, attorney, or court may weigh it with vehicle damage, statements, reports, road conditions, and applicable law. The National Association of Insurance Commissioners advises drivers to collect scene information and cooperate with the claim investigation. Preserve the original files, note the date and time, and provide footage through the method requested by the relevant authority or insurer.
A rear dash cam is most valuable when its clock is synchronized with the front camera and the original clip retains its metadata. Copy the relevant files before loop recording can overwrite them. Do not trim, enhance, or post the only copy online. Keep a separate backup and avoid making claims about details that the recording does not clearly show.
Blind Spots Created by Vehicle Shape and Camera Position
Vehicle design changes what any camera can see. NHTSA research on rear visibility found that field of view is affected by structural design and that taller or longer vehicles can have larger areas hidden from direct view. A recording camera mounted inside the glass has additional limits from pillars, head restraints, window frames, tint bands, defroster lines, spoilers, and cargo.
Camera position can create its own blind spots. A front camera mounted far to one side may lose part of the opposite lane. A rear lens mounted low may show more bumper and less distant traffic. A lens placed behind a thick defroster line, wiper pivot, or brake-light housing may carry a permanent obstruction through every clip. The interior rearview mirror can also hide part of the front camera's view if the lens sits too close to the mirror housing.
A front-and-rear dash camera can provide broad coverage, but a two-channel system normally leaves the side doors and much of the cross-traffic area outside both views. NHTSA explains that rear cross-traffic warning can detect hazards outside a backup camera's view. A recording dash camera and a factory backup camera also serve different purposes, so neither should be assumed to perform the other's safety function.
Choosing a Rear Lens Location for Sedans, SUVs, and Hatchbacks
Start with a temporary position near the upper center of the rear glass, then adjust for the actual vehicle. Centering usually produces balanced left and right context, while a high position reduces the amount of parcel shelf or interior trim in the frame. The final location must also allow a clean cable route and full movement of any hatch or liftgate.
| Vehicle Type | Useful Starting Point | Check Before Mounting | Cable Consideration |
| Sedan | Upper center of fixed rear glass | Defroster lines, brake-light housing, parcel shelf | Route along trim without crossing curtain-airbag deployment paths |
| SUV or wagon | Upper center of liftgate glass | Rear wiper sweep, spoiler, tint band, open-hatch angle | Leave a controlled service loop and protect the cable at moving joints |
| Hatchback or liftback | Upper hatch glass or approved trim mount | Full hatch travel, glass angle, heated grid, cargo obstruction | Use the factory-style rubber boot only when the cable and connector can pass safely |
For a sedan, fixed rear glass simplifies alignment, but a steep rake can increase reflections from the cabin. For an SUV or hatchback, open the tailgate through its full travel before fixing the mount. Confirm that the cable does not stretch, pinch, rub on a sharp edge, or hang into the cargo area. Keep wiring clear of airbags and vehicle controls. When trim removal or airbag routing is uncertain, use a qualified installer and follow the vehicle and camera manuals.
Balancing Front Detail With a Useful Rear Field of View
Field of view and recognizable detail involve a tradeoff. A wider rear image includes more adjacent lanes, but the same recording pixels must represent a larger scene. Vehicles and plates therefore appear smaller at a given distance. A narrower view can preserve more pixels on distant objects but may omit nearby side activity. The useful choice depends on the road width, camera resolution, lens quality, compression, and mounting angle, not the angle specification alone.
Do not judge a front-and-rear dash cam system from a paused app preview. Wireless previews may be compressed or displayed at a lower resolution than the saved file. Download the original front and rear clips, view them on a larger screen, and compare moving traffic at near, middle, and far distances. Plate capture is never guaranteed because speed, glare, darkness, dirt, motion blur, and viewing angle can defeat even a high-resolution camera.
Buyers comparing the best front and rear dash cam options should look beyond the front-camera headline. Check both channels' recording resolution, frame rate, field of view, night imaging, bitrate or file quality, storage support, heat resistance, recording reliability, and whether both streams remain active in the modes you plan to use. A front and back dash cam with a weak rear channel may not meet a driver whose main concern is evidence behind the vehicle.

Coverage Checks to Perform in Daylight and After Dark
Test coverage before removing the final adhesive backing. Use temporary film or a removable positioning method approved by the manufacturer, connect both cameras, and record the same route in daylight and darkness. Review the original files rather than relying only on the live view.
- Park on level ground and confirm that both horizons are straight. Check that neither view is dominated by sky, hood, headliner, parcel shelf, or bumper.
- Drive a multilane road and let vehicles pass on both sides. Note where each vehicle enters and leaves the frame and where neither camera records it.
- Stop behind a vehicle at a normal distance, then review whether traffic lights, lane markings, vehicle position, and surrounding context remain visible.
- At night, repeat the route under streetlights and on a darker road. Look for windshield reflections, rear-window tint effects, glare, motion blur, and excessive image noise.
- Open and close the hatch or liftgate several times, then inspect the cable, connector, and camera aim. Recheck the view after driving over a rough but safe road surface.
- Clean both windows and lenses, confirm the date and time, verify that front and rear files are saved, and test emergency-file locking according to the manual.
A dash cam with rear camera coverage should also be tested in rain if conditions allow safe driving. The front lens needs to sit within the wiper-cleared area, while the rear lens benefits from the area cleared by the rear wiper when the vehicle has one. On a sedan without a rear wiper, clean glass and a working defroster become especially important.
Plan Two Camera Coverage Around Your Vehicle
Choose the system after mapping the vehicle, not before. Measure the cable route, identify fixed and moving glass, note tint and heating elements, check the required mounting area, and decide which missing view matters most. A dual dash cam is another common name for a 2-channel dash cam: one channel records ahead and the other records behind. It does not normally record the cabin or both side windows.
For drivers who prioritize detail from both directions, the GKU E200 Dual 4K dash cam records 4K at the front and rear and lists a 170-degree front field of view and 150-degree rear field of view. For a 4K front and 1080P rear configuration, the GKU D600 Pro Max lists the same front and rear viewing angles, Sony STARVIS 2 imaging, built-in GPS, and support for microSD cards up to 512GB. Availability and package contents can change, so confirm the selected option before checkout.
Compare those recording priorities with your vehicle's blind spots, rear-glass layout, and typical night route. Then review our 2-channel dash cam collection and choose the setup that gives both cameras a clear, stable view. Plan the mount first, test the actual files, and make the final installation only after both angles capture the evidence you expect.
Frequently Asked Questions
Q1: Which Collision Details Are Most Likely to Appear Only in Rear Footage?
Rear footage is especially useful for details that develop before the impact, such as whether the vehicle behind remained centered, drifted across a lane line, or disappeared from view before contact. When reviewing a clip, compare its timestamp with the front recording and keep several seconds before and after the event so the sequence is not taken out of context.
Q2: Where Should a Rear Lens Sit When a Hatch Window Opens With the Tailgate?
The lens should remain aimed through clear glass when the tailgate is fully closed, because that is its recording position. Before fixing the mount, check that the third brake light, wiper motor cover, antenna pattern, and trim do not enter the frame. Cycle the hatch repeatedly and recheck the aim after the cable has settled.
Q3: How Can Drivers Identify Blind Spots Before Fixing the Cameras in Place?
Create a simple static map around the parked vehicle. Place visible markers at regular intervals behind each rear corner and along both sides, then note which markers appear in the front view, rear view, both views, or neither view. This produces a repeatable blind-spot record without relying only on visual memory.
Q4: Does a Wide Rear Field of View Make Distant Vehicles Harder to Recognize?
It can, particularly when the subject is far away or viewed on a small screen. To compare coverage fairly, park a vehicle at several measured distances and inspect the original file at 100 percent scale. Record when identifying features become difficult to distinguish, and avoid treating digital zoom as added optical detail.
Q5: Which Test Route Can Confirm That Both Cameras Cover the Intended Angles?
Use a short loop that can be repeated at a similar time and speed, then label each recording with the camera settings and conditions. Include one section where a following vehicle remains at a steady, safe distance and another where traffic moves across the rear frame. Repeating the loop makes changes in aim or image quality easier to compare.
0 commentaire